The product has been added to your cart
Highlights Est. 2001
info@hlstore.com
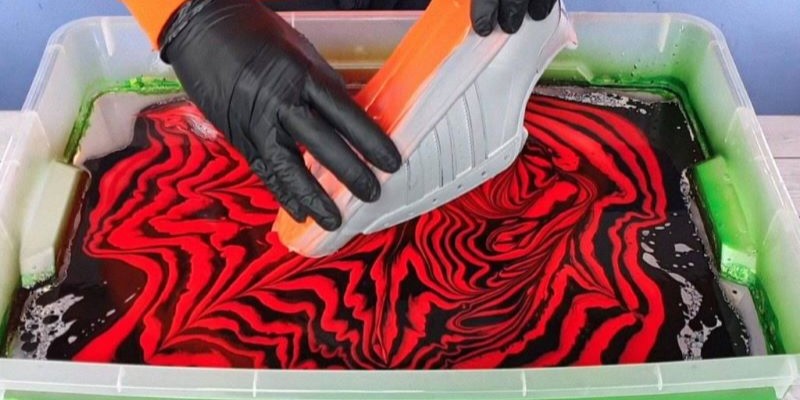
Use hydro dipping to apply unique designs to your favourite things. Hydro dipping, also called watermarbling, water transfer printing, immersion printing and hydrographic, is a technique that is becoming increasingly popular. The technology is mainly used in the automotive industry on parts, helmets, motorcycles or whole cars, and in the music industry on guitars. Below you'll find a list with everything you need to get started at home.
By applying paint or pre-printed designs to a water surface and then slowly submerging three-dimensional objects, the paint transfers, and thanks to the water's surface tension, it can be molded around any irregularities. Hydro dipping can be used on plastic, glass, wood, ceramics, fiberglass, metal, etc., but you are recommended to prime the surface.
Here are some videos demonstrating how to make your own hydro dip.
Hydro dipping requires some practice and many factors affect the result such as the temperature of the water, spray color, the angle you dip the object in, etc. Not recommended for use on glass, plates or similar items where food comes into contact with the surface.

Tjärhovsgatan 1. Stockholm
Tel: 08–6436900
Open Hours
Monday - Friday: 11.00 - 18.00
Saturday: 11.00 - 16.00
Sunday: Closed
© 2001–2026 Highlights/KR Distribution AB.
![]()
![]()
![]()
![]()
.png)
Highlights Est. 2001
info@hlstore.com


.png)

.png)